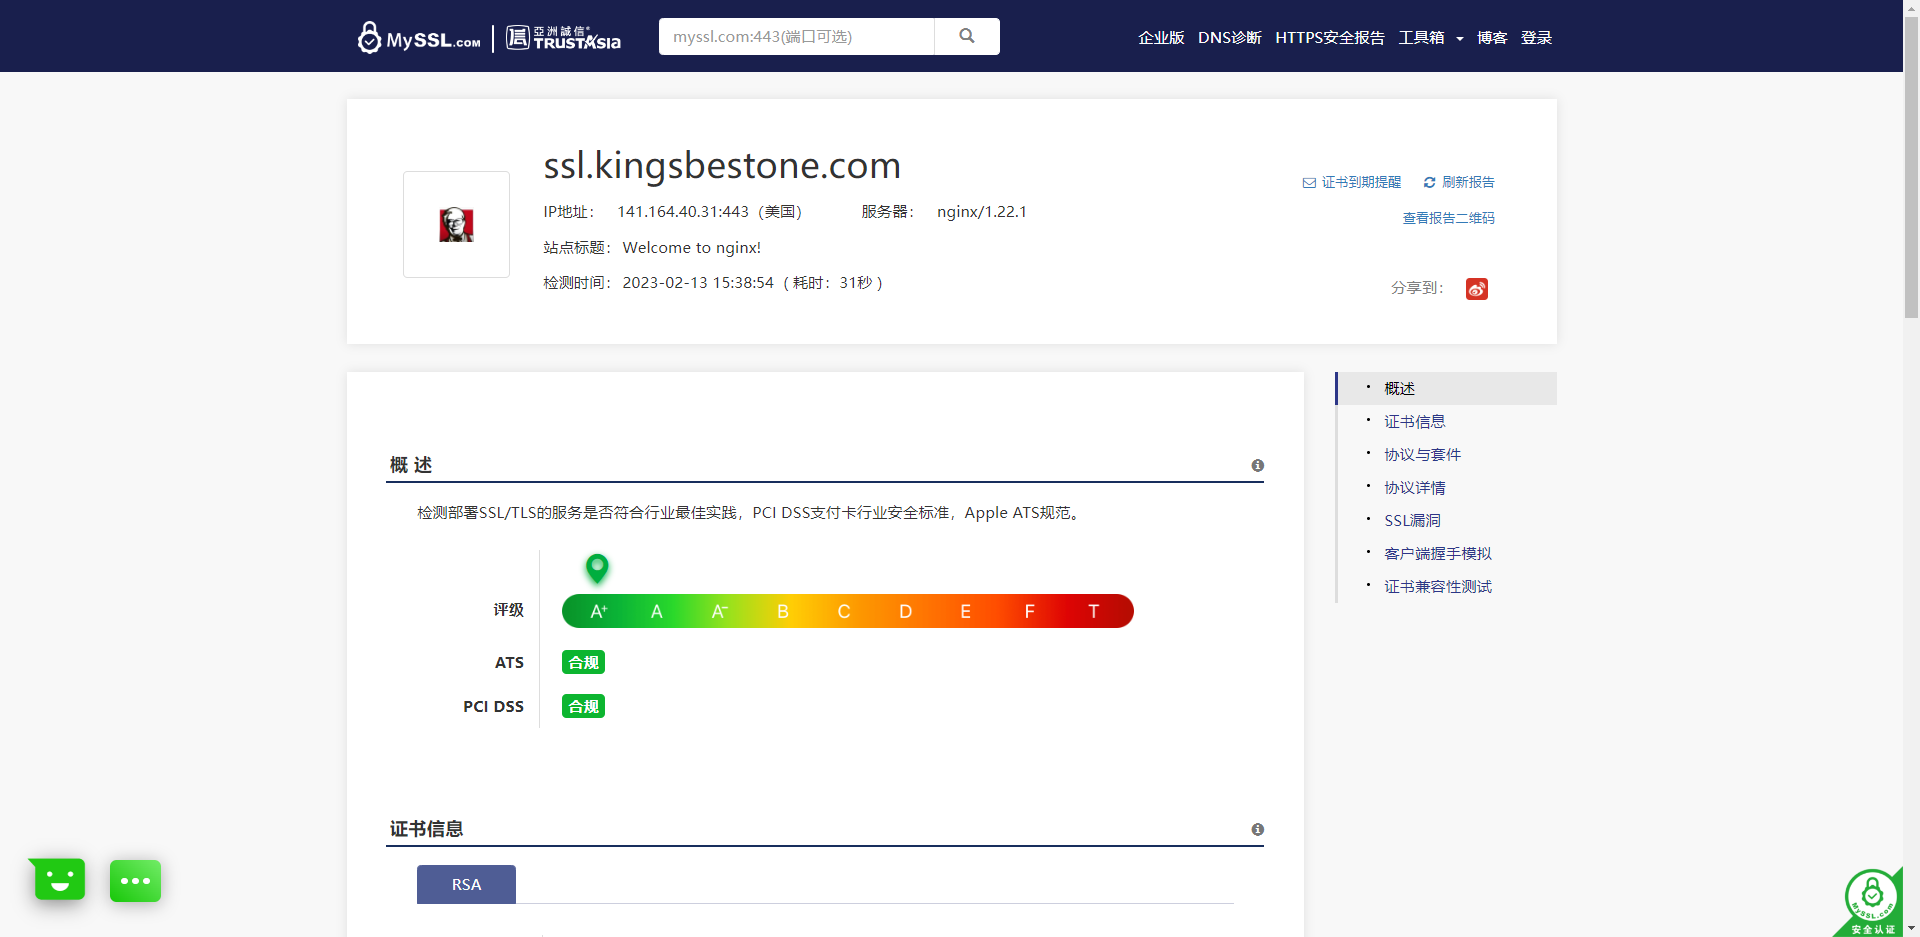
给NGINX部署HTTPS,并调优安全等级为A+(myssl.com),使用最新协议TLSv1.3部署。
部署环境:
- 系统:Centos7
- 更换YUM源
- 关闭SELinux
- 关闭防火墙
- 申请 Let’s Encrypt 证书
- 事情先解析域名到VPS
1.安装OPENSSL
1-1.更新系统软件
yum -y update
1-2.安装编译所需软件
yum install -y make gcc perl-core pcre-devel zlib-devel
1-3.首先下载安装包并上传到服务器。
1-4.解压安装包
tar -zxvf <压缩包全名>
1-5.进入解压后的openssl目录
1-6.配置编译参数
./config --prefix=/usr --openssldir=/etc/ssl --libdir=lib no-shared zlib-dynamic
1-7.编译
make
1-8.测试编译包
make test
1-9.安装编译完成的包
make install
1-10.创建系统环境变量文件
vi /etc/profile.d/openssl.sh
1-11.添加以下内容
export LD_LIBRARY_PATH=/usr/local/lib:/usr/local/lib64
1-12.加载环境变量
source /etc/profile.d/openssl.sh
1-13.查看OPENSSL版本,以验证是否安装成功
openssl version -a
2.安装NGINX
2-1.安装所需软件
yum -y install gcc gcc-c++ pcre pcre-devel zlib zlib-devel gd gd-devel openssl openssl-devel
2-2.给NGINX服务创建用户和租
/usr/sbin/groupadd www
/usr/sbin/useradd -g www www
2-3.设置Linux高负载参数
ulimit -SHn 65535
2-4.下载NGINX安装包并上传到服务器
- NGINX下载地址:http://nginx.org/en/download.html
2-5.解压NGINX安装包
tar -zxvf <压缩包名字>
2-6.进入解压出来的NGINX目录
2-7.配置NGINX编译参数
- NGINX官网参数说明:http://nginx.org/en/docs/configure.html
./configure \
--prefix=/usr/local/nginx \
--user=www \
--group=www \
--with-pcre \
--with-openssl=/home/openssl-3.0.8 \
--with-http_ssl_module \
--with-http_v2_module \
--with-http_realip_module \
--with-http_addition_module \
--with-http_sub_module \
--with-http_dav_module \
--with-http_flv_module \
--with-http_mp4_module \
--with-http_gunzip_module \
--with-http_gzip_static_module \
--with-http_random_index_module \
--with-http_secure_link_module \
--with-http_stub_status_module \
--with-http_auth_request_module \
--with-http_image_filter_module \
--with-http_slice_module \
--with-mail \
--with-threads \
--with-file-aio \
--with-stream \
--with-mail_ssl_module \
--with-stream_ssl_module
2-8.NGINX编译并安装
make && make install
2-9.创建systemctl系统NGINX单元
vi /usr/lib/systemd/system/nginx.service
2-10.写入如下内容
[Unit]
Description=The nginx HTTP and reverse proxy server
After=syslog.target network.target remote-fs.target nss-lookup.target

[Service]
Type=forking
PIDFile=/usr/local/nginx/logs/nginx.pid
ExecStartPre=/usr/local/nginx/sbin/nginx -t
ExecStart=/usr/local/nginx/sbin/nginx
ExecReload=/usr/local/nginx/sbin/nginx -s reload
ExecStop=/usr/local/nginx/sbin/nginx -s stop
PrivateTmp=true

[Install]
WantedBy=multi-user.target
2-11.查看运行状态,确认是否设置成功
systemctl status nginx.service
2-12.设置开机自启动并重启NGINX服务,然后查看状态
systemctl enable nginx.service && systemctl restart nginx.service && systemctl status nginx.service
2-13.创建系统环境变量文件
vi /etc/profile.d/nginx.sh
2-14.写入如下内容
export PATH=/usr/local/nginx/sbin:$PATH
2-15.载入环境变量
source /etc/profile.d/nginx.sh
2-16.查看NGINX版本,确认是否设置成功
nginx -V
3.配置NGINX
3-1.NGINX程序目录
- 本教程默认安装目录为:/usr/local/nginx
- NGINX默认配置文件目录为:/usr/local/nginx/conf/nginx.conf
3-2.编辑NGINX配置文件为如下内容:
- 记得替换自己的域名和证书之类的相关内容
- SSL配置生成网站(可以参考):https://ssl-config.mozilla.org/
#user  nobody;
worker_processes  1;

#error_log  logs/error.log;
#error_log  logs/error.log  notice;
#error_log  logs/error.log  info;

#pid        logs/nginx.pid;


events {
    worker_connections  1024;
}


http {
    include       mime.types;
    default_type  application/octet-stream;

    #log_format  main  '$remote_addr - $remote_user [$time_local] "$request" '
    #                  '$status $body_bytes_sent "$http_referer" '
    #                  '"$http_user_agent" "$http_x_forwarded_for"';

    #access_log  logs/access.log  main;

    sendfile        on;
    #tcp_nopush     on;

    #keepalive_timeout  0;
    keepalive_timeout  65;

    gzip  on;

  server {
    listen       80 default_server;
    #server_name  localhost;

    location / {
      return 301 https://$host$request_uri;
    }

    #charset koi8-r;

    #access_log  logs/host.access.log  main;

    #location / {
    #    root   html;
    #    index  index.html index.htm;
    #}

    #error_page  404              /404.html;

    # redirect server error pages to the static page /50x.html
    #
    #error_page   500 502 503 504  /50x.html;
    #location = /50x.html {
    #    root   html;
    #}

    # proxy the PHP scripts to Apache listening on 127.0.0.1:80
    #
    #location ~ \.php$ {
    #    proxy_pass   http://127.0.0.1;
    #}

    # pass the PHP scripts to FastCGI server listening on 127.0.0.1:9000
    #
    #location ~ \.php$ {
    #    root           html;
    #    fastcgi_pass   127.0.0.1:9000;
    #    fastcgi_index  index.php;
    #    fastcgi_param  SCRIPT_FILENAME  /scripts$fastcgi_script_name;
    #    include        fastcgi_params;
    #}

    # deny access to .htaccess files, if Apache's document root
    # concurs with nginx's one
    #
    #location ~ /\.ht {
    #    deny  all;
    #}
  }


    # another virtual host using mix of IP-, name-, and port-based configuration
    #
    #server {
    #    listen       8000;
    #    listen       somename:8080;
    #    server_name  somename  alias  another.alias;

    #    location / {
    #        root   html;
    #        index  index.html index.htm;
    #    }
    #}


    # HTTPS server

  server {
    listen       443 ssl http2;
    #server_name  localhost;

    ssl_certificate      /etc/letsencrypt/live/ssl.kingsbestone.com/fullchain.pem;
    ssl_certificate_key  /etc/letsencrypt/live/ssl.kingsbestone.com/privkey.pem;
    ssl_session_timeout 1d;
    ssl_session_cache shared:MozSSL:10m;  # about 40000 sessions

    # intermediate configuration
    ssl_protocols TLSv1.3 TLSv1.2;
    ssl_ciphers ECDHE-ECDSA-AES128-GCM-SHA256:ECDHE-RSA-AES128-GCM-SHA256:ECDHE-ECDSA-AES256-GCM-SHA384:ECDHE-RSA-AES256-GCM-SHA384:ECDHE-ECDSA-CHACHA20-POLY1305:ECDHE-RSA-CHACHA20-POLY1305:DHE-RSA-AES128-GCM-SHA256:DHE-RSA-AES256-GCM-SHA384;
    ssl_prefer_server_ciphers on;

    # HSTS (ngx_http_headers_module is required) (63072000 seconds)
    add_header Strict-Transport-Security "max-age=63072000" always;

    location / {
      root   html;
      index  index.html index.htm;
    }
  }

}
3-3.检查配置文件是否有错
nginx -t
3-4.重启NGINX服务
systemctl restart nginx.service
3-5.查看NGINX运行状态,看是否有红色报错,如果没有则代表正常。
systemctl status nginx.service
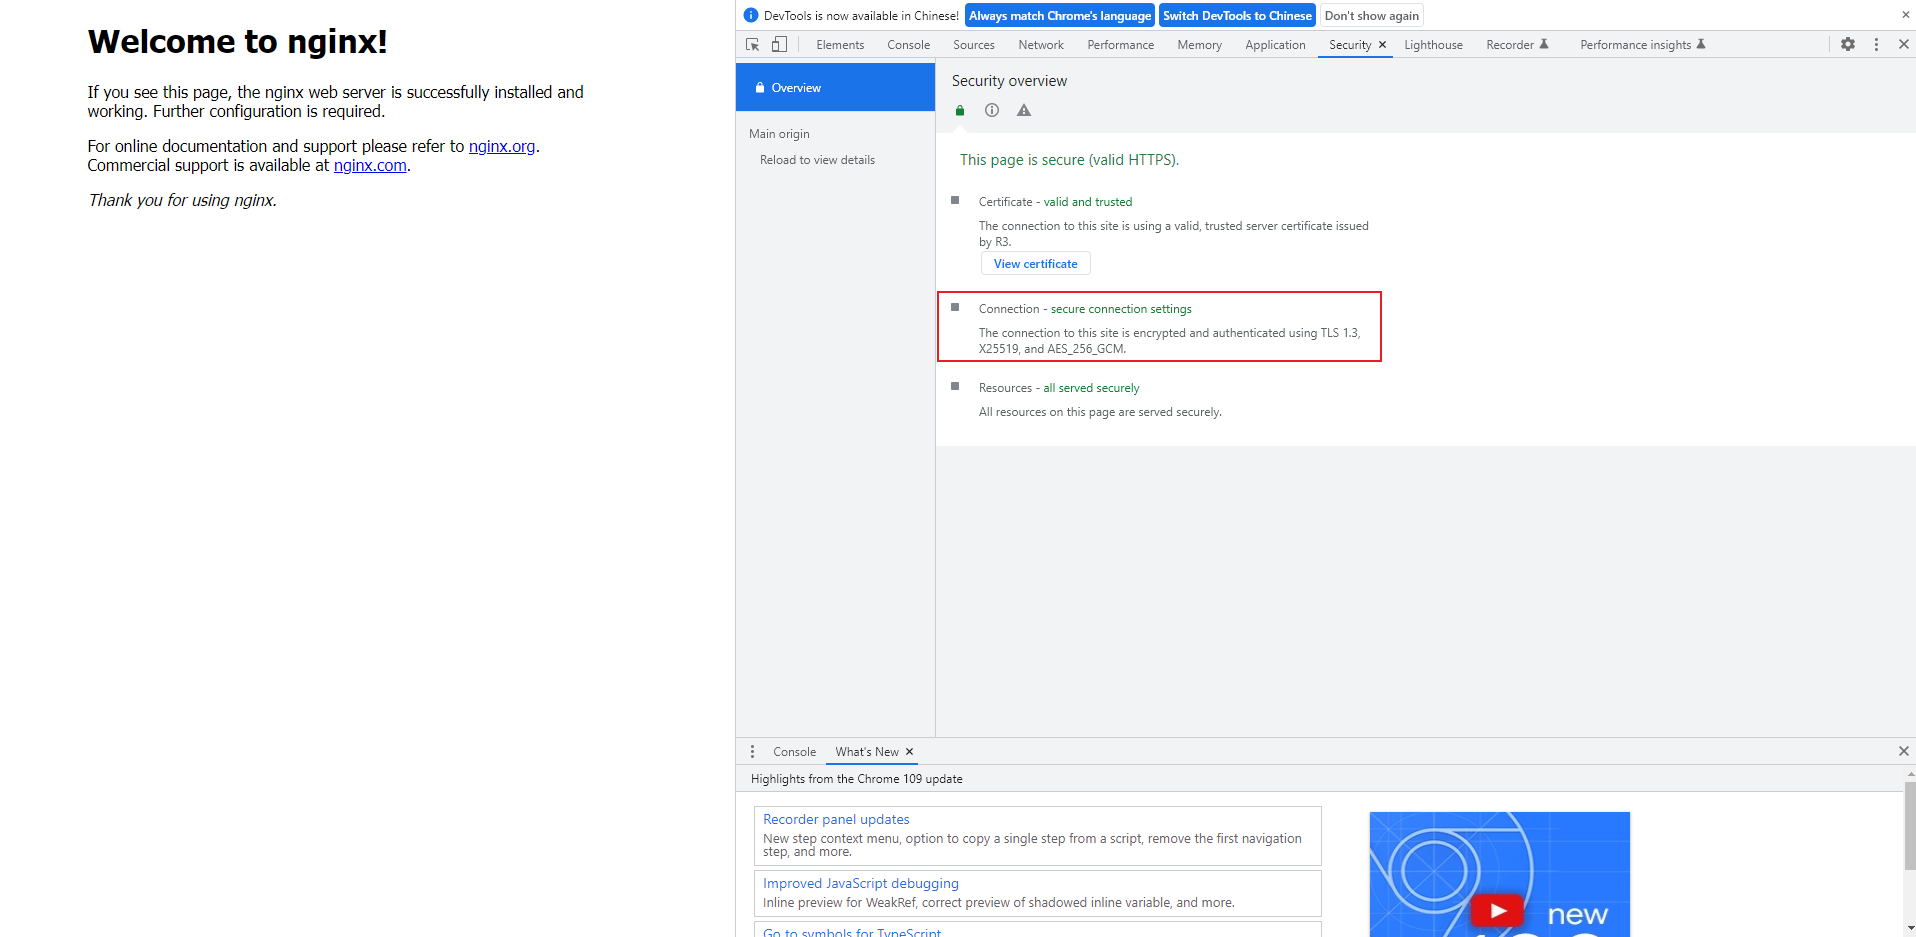
3-6.打开浏览器访问你的域名看是否工作正常。
- 打开浏览器检查选项,找到安全选项,查看协议是否为 tls 1.3 ;如果是则代表正常
- 打开 myssl.com 网站,输入你的域名检查你的HTTPS配置是否足够安全,如果为A+最高则代表正常。
3-7.完成